Safety inspections step by step: your essential guide
Safety inspections step by step: your essential guide
TL;DR:
- Proper planning and documentation are essential for effective safety inspections.
- Conducting systematic walkthroughs and worker interviews improves hazard identification.
- Using digital tools enhances record-keeping, action tracking, and continuous safety improvement.
Safety inspections are one of the most critical activities a compliance officer oversees, yet they remain one of the most inconsistently executed. Missed steps, poorly documented findings, and unresolved corrective actions are not just administrative failures; they expose your organisation to regulatory enforcement, reputational damage, and, most seriously, preventable injuries. A structured step-by-step process is the foundation of every effective safety inspection in UK industrial settings. This guide gives you exactly that: a reliable, evidence-based method to run inspections that genuinely improve workplace safety and hold up under scrutiny.
Table of Contents
- What you need before starting a safety inspection
- Step-by-step process for conducting safety inspections
- Key areas and checklists for industrial safety inspections
- Recording findings and driving corrective actions
- Troubleshooting: common mistakes and advanced tips
- What most guides miss about safety inspections
- Take safety inspections further with the right tools
- Frequently asked questions
Key Takeaways
| Point | Details |
|---|---|
| Structured preparation | Define objectives and gather materials before starting any inspection. |
| Follow step-by-step process | Use a repeatable sequence for walkthroughs, interviews, and hazard checks for consistency and compliance. |
| Prioritise key risks | Address high-risk findings quickly, assigning ownership and clear deadlines. |
| Record and act | Document findings accurately and focus on closure rates for corrective actions. |
| Continuous improvement | Blend proactive self-inspections with official benchmarks for lasting safety gains. |
What you need before starting a safety inspection
Thorough preparation is what separates a meaningful inspection from a box-ticking exercise. The PDCA (Plan, Do, Check, Act) model, widely recognised in UK health and safety management, reinforces this point clearly. Without proper planning, even experienced inspectors miss hazards, overlook documentation gaps, and produce reports that cannot drive real improvement.
Defining your objectives and reviewing previous reports are the essential first steps before any inspection begins. Are you checking for regulatory compliance against specific legislation such as PUWER, LOLER, or COSHH? Are you reviewing arrangements under CDM 2015 on a construction project, or checking whether incidents and dangerous occurrences have been escalated appropriately under RIDDOR? Or are you benchmarking against best practice standards and internal controls? Knowing this shapes every decision you make during the inspection itself.
Essential documents and tools to gather before you start:
- Previous inspection reports and outstanding corrective actions
- Relevant risk assessments and method statements
- Maintenance and equipment service records
- Relevant legislation, approved codes of practice, and internal procedures
- Blank inspection report templates and photographic evidence forms
- Appropriate PPE for the areas being inspected
- Site maps and layout plans for complex environments
- Accident, near-miss, and RIDDOR reporting records where relevant
- Training, competency, and permit-to-work records
Identifying the right personnel is equally important. Assign a lead inspector, a note-taker, and, where appropriate, a worker representative. This ensures balanced observations and reduces the chance of management bias skewing findings. Our guidance on construction site safety tips covers personnel responsibilities in more detail for site-based environments.
| Task | Responsible person | Timeframe before inspection |
|---|---|---|
| Review previous findings | Lead inspector | 5 to 7 days |
| Confirm inspection scope | Safety manager | 5 days |
| Gather documentation | Administrator | 3 days |
| Brief inspection team | Lead inspector | 1 day |
| Confirm PPE and equipment | Lead inspector | 1 day |
Pro Tip: Use digital site diaries to log preparatory notes and pre-inspection observations. This creates a timestamped audit trail that supports your findings if they are ever challenged by management, clients, principal contractors, or regulators.
Setting realistic timelines is critical. A rushed inspection produces shallow findings. For large manufacturing sites or multi-level facilities, allocate at least half a day per major area. Refer to our safety audits guidance for scope-setting frameworks that work across different industrial environments. On higher-risk projects, especially those affected by the Building Safety Act, inspection planning should also reflect dutyholder responsibilities, information management, and evidence retention expectations.
Step-by-step process for conducting safety inspections
With your preparation ready, here is the complete sequence for running a safety inspection that stands up to official scrutiny. This process mirrors the approach used by HSE inspectors during formal visits, which means following it also prepares you for external inspections.
- Arrival and initial discussion. Introduce yourself to site management, confirm the scope and any changes since your last visit, and review any recent incidents or near misses. This sets the tone and surfaces immediate concerns before the walkthrough begins.
- Physical walkthrough. Move systematically through the site, observing conditions, equipment states, worker behaviour, and environmental hazards. Do not rush this stage. Take photographs of every notable finding, both positive and negative.
- Worker interviews. Speak directly with workers at their workstations. Ask open questions about their understanding of procedures, any concerns they have raised, and whether they feel safe. Workers often identify hazards that management is unaware of.
- Documentation review. Check maintenance logs, training records, COSHH assessments, and permit-to-work records. Gaps in documentation are findings in themselves, even if the physical environment looks compliant.
- Hazard identification and risk rating. Classify each finding by severity and likelihood. Prioritise immediate dangers for urgent action and schedule lower-risk items within a defined timeframe.
- Closing meeting. Share your preliminary findings with site management before you leave. This allows them to address urgent issues immediately and ensures there are no surprises in the formal report.
HSE inspectors follow this same sequence during site visits, covering arrival, walkthrough, documentation review, interviews, and a closing discussion. Mirroring this approach internally means your team is always inspection-ready.
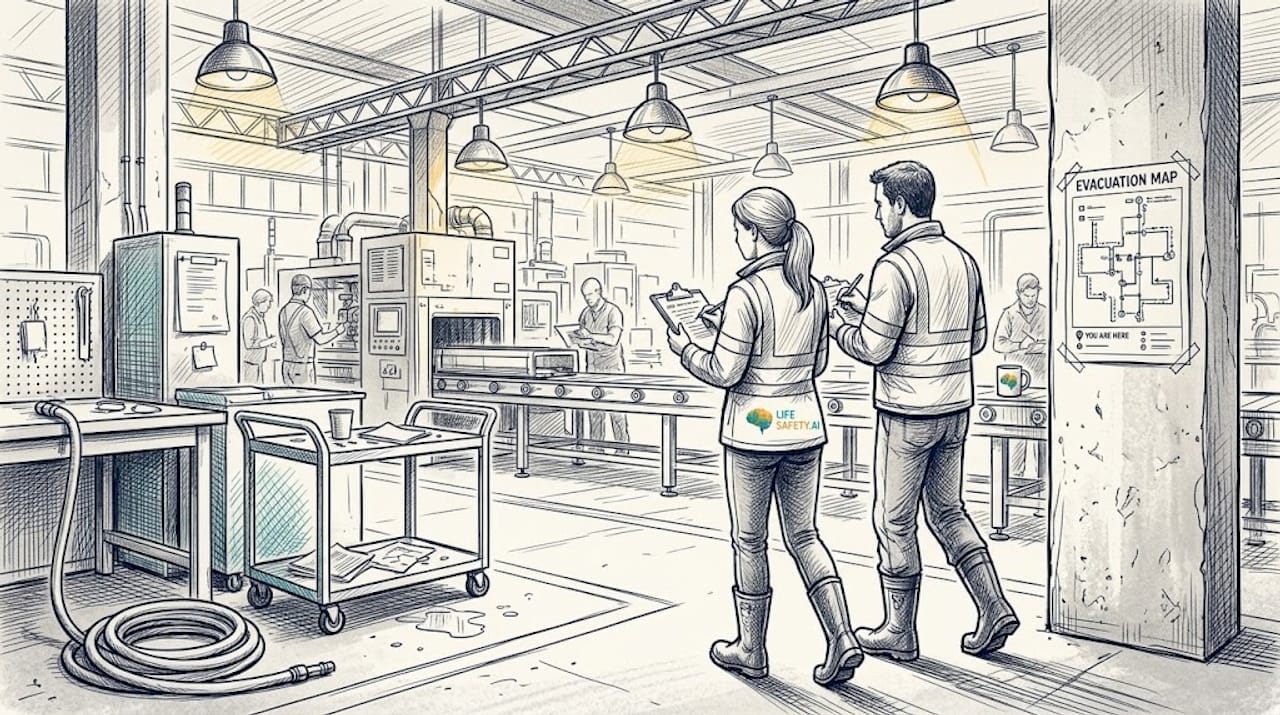
The HSE’s Plan-Do-Check-Act model places workplace inspections firmly within the “Check” phase, reinforcing that inspections are not a one-off activity but a continuous performance monitoring tool.
For specialist environments, adjust the sequence accordingly. Scaffolding inspections, for example, require specific competency checks and load calculations that go beyond a standard walkthrough. Similarly, surface preparation and coating operations carry specific risks, and reviewing painting safety compliance guidance can help you structure checks for those environments.
Pro Tip: Never skip the worker interview stage. In our experience, at least 30% of significant findings in industrial settings are first surfaced through direct conversations with operatives, not through visual checks alone.
Key areas and checklists for industrial safety inspections
Understanding the process is step one, but what you target during inspections is just as vital, especially in high-hazard industries. Different sectors carry different primary risks, and your checklist must reflect the specific hazards present on site.
Common hazard categories to inspect in industrial environments:
- Machinery guarding and safeguards, including interlocks and emergency stops
- Manual handling practices and mechanical handling equipment condition
- Working at height: scaffolding, ladders, MEWPs, and edge protection
- Electrical systems, isolation procedures, and portable appliance testing records
- Chemical storage, labelling, and COSHH assessments
- Fire safety: suppression systems, escape routes, and extinguisher records
- Personal protective equipment availability, condition, and correct usage
- Housekeeping and slip, trip, and fall hazards
- Permit-to-work controls for hot works, confined spaces, and isolations
- Construction phase controls under CDM 2015, including welfare, coordination, and supervision
For engineering workshops specifically, key checklist items include machine safeguards, maintenance records, operator competency evidence, COSHH compliance, and current risk assessments for each significant task. Each of these items should be verified with documentary evidence, not just visual observation.
“Inspections without documentary verification are incomplete. A machine may look guarded, but without a maintenance record confirming the guard has been checked, you cannot confirm compliance.”
High-risk sectors require additional layers of scrutiny. Offshore environments demand prioritisation based on specific hazards and operator performance history, with specialist guidance covering well control and structural integrity. The same principle applies onshore: tailor your inspection depth to the actual risk profile of the site.
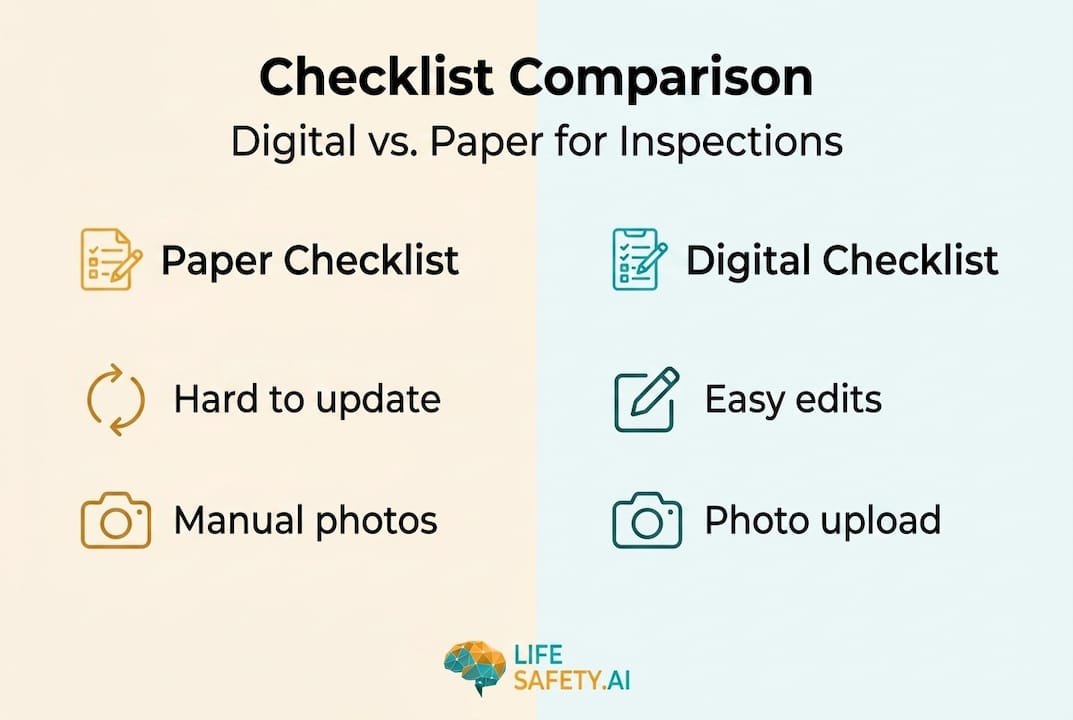
Digital checklists add significant value here. Rather than paper forms that can be lost or illegible, digital tools allow you to attach photographs directly to findings, assign risk ratings in real time, and share reports instantly. Our risk assessment tools integrate directly with inspection workflows, making it straightforward to link inspection findings to existing risk assessments.
For abrasive blasting and surface preparation operations, reviewing sandblasting safety essentials will help you build a more targeted checklist for those specific hazards, including respiratory protection and blast containment.
| Feature | Paper checklist | Digital checklist |
|---|---|---|
| Photo evidence | Separate attachment required | Embedded directly in record |
| Real-time sharing | Not possible | Instant |
| Action tracking | Manual follow-up | Automated reminders |
| Audit trail | Risk of loss or damage | Secure cloud storage |
| Regulatory compliance | Acceptable if accurate | Exceeds minimum requirements |
Recording findings and driving corrective actions
Conducting checks is only effective if issues are documented and resolved. This is where many inspection programmes fall short. Findings are recorded, reports are filed, and nothing changes. The inspection becomes a compliance ritual rather than a safety improvement tool.
A structured approach to recording findings must include four elements for every issue identified: a clear description of the hazard, the applicable legal or best practice standard it breaches, a risk rating, and a named action owner with a realistic deadline. Without those four elements, corrective action becomes vague, accountability weakens, and closure rates fall.
Every inspection finding should capture:
- A precise description of what was observed
- The location, asset, or work activity affected
- The relevant legal duty or internal standard, such as HSWA, PUWER, COSHH, CDM 2015, or fire safety requirements
- A severity and likelihood score, or equivalent risk rating
- Immediate controls taken on the day, if any
- The person responsible for corrective action
- A target completion date
- Evidence required for closure, such as photographs, revised RAMS, training records, or maintenance certificates
Where findings relate to incidents, dangerous occurrences, or occupational ill health, ensure your escalation route aligns with RIDDOR reporting thresholds. An inspection may uncover a failure that has already crossed into reportable territory, and that should trigger immediate review rather than waiting for the next management meeting.
Risk rating matters because it determines urgency. A missing handrail on an active access route, an unguarded machine, or a failed isolation procedure should never sit in a generic action list with low-level housekeeping issues. High-risk findings require immediate control measures, often before the inspection is even complete.
| Risk level | Typical response | Expected timeframe |
|---|---|---|
| High | Stop work, isolate area or equipment, implement temporary controls, escalate to management immediately | Immediate to 24 hours |
| Medium | Assign action owner, plan corrective work, verify interim controls remain effective | 2 to 14 days |
| Low | Record, monitor, and close through routine maintenance or housekeeping systems | Within planned cycle |
Closing actions properly is just as important as raising them. Too many organisations measure how many inspections they complete, but not how many findings they actually resolve. A mature inspection programme tracks closure rate, average time to close, repeat findings, and overdue high-risk actions. Those metrics tell you whether inspections are improving safety or simply generating paperwork.
Digital workflows make this far easier. With LifeSafety.ai safety management tools, teams can assign actions instantly, attach evidence, monitor deadlines, and maintain a defensible audit trail. That is particularly valuable where principal contractors, clients, insurers, or regulators may later ask how a known hazard was managed.
Troubleshooting: common mistakes and advanced tips
Even well-intentioned inspection programmes can drift into poor habits. The most common failures are not usually a lack of effort; they are a lack of consistency, challenge, and follow-through.
Common mistakes that weaken inspection quality:
- Using the same generic checklist for every site regardless of risk profile
- Focusing only on visible conditions and ignoring documentation or competence
- Failing to speak with workers carrying out the task
- Recording vague findings such as “improve housekeeping” without location, owner, or deadline
- Allowing repeat findings to remain open across multiple inspections
- Not escalating serious breaches quickly enough
- Treating inspections as separate from audits, incident learning, and risk assessment review
One advanced technique is to vary the inspection lens. On one visit, focus heavily on plant and equipment. On another, concentrate on behavioural controls, supervision, permits, or contractor management. This prevents inspections becoming predictable and helps uncover deeper system weaknesses.
Another strong practice is to compare inspection findings against incident trends. If near misses repeatedly involve slips, vehicle movements, or manual handling, your inspection checklist should be adjusted to test those controls more rigorously. The same applies if you have had recent enforcement attention, insurance recommendations, or internal audit findings.
Advanced tips for stronger inspections:
- Rotate inspectors periodically to reduce familiarity bias.
- Use photographs consistently to support both positive and negative findings.
- Review a sample of closed actions on site to confirm they are genuinely complete.
- Cross-check inspection findings against RAMS, permits, and training records.
- Escalate repeat high-risk findings to senior leadership, not just local supervisors.
- Use trend analysis to identify recurring failures by area, contractor, or work type.
For construction and higher-risk building work, inspections should also test whether dutyholder arrangements remain effective in practice. Under CDM 2015, planning, coordination, supervision, and competence are not theoretical requirements. They should be visible in the way work is organised on site. Where occupied higher-risk buildings are involved, the Building Safety Act raises the importance of evidence, accountability, and information management even further.
What most guides miss about safety inspections
Most inspection guides explain how to walk a site and fill in a checklist. Far fewer explain the strategic value of inspections as a management control. That is the gap many organisations need to close.
Inspections are not just about spotting hazards on the day. They are one of the clearest ways to test whether your safety management system is functioning in reality. If procedures say one thing but site conditions show another, the inspection is telling you something important about leadership, supervision, competence, or resource allocation.
This is why the best inspection programmes do three things at once:
- They identify immediate unsafe conditions and behaviours.
- They test whether underlying management controls are working.
- They generate trend data that informs future risk reduction priorities.
That broader view matters when dealing with regulators. HSE enforcement decisions are rarely based on a single untidy area or isolated paperwork gap. They are shaped by whether the organisation appears to understand its risks, control them consistently, and act when problems are identified. A robust inspection programme demonstrates that you are actively checking and improving, not waiting for an incident to expose weaknesses.
It also matters culturally. When workers see that inspections lead to visible improvements, trust increases. When they see the same defects raised repeatedly with no action, confidence falls and reporting dries up. In that sense, inspection quality directly affects workforce engagement.
The real test of an inspection programme is not how many forms are completed. It is whether known risks are reduced, repeated failures decline, and workers believe concerns will be acted on.
That is also why self-inspections should be aligned with wider governance. Link them to audits, toolbox talks, incident investigations, contractor reviews, and management meetings. The more connected your safety information is, the more useful each inspection becomes.
Take safety inspections further with the right tools
If your current inspection process relies on paper forms, email chains, and manual action chasing, you are making a difficult job harder than it needs to be. Modern inspection programmes benefit from digital systems that support consistency, visibility, and accountability.
With the right platform, you can standardise templates by site or activity, capture photographs and notes in real time, assign actions before leaving the area, and monitor closure centrally. That improves both operational control and legal defensibility.
Digital tools are especially useful for:
- Creating site-specific inspection templates for construction, manufacturing, and maintenance environments
- Linking findings to existing risk assessments and method statements
- Assigning corrective actions with owners and deadlines
- Maintaining a secure audit trail for internal review and external scrutiny
- Tracking trends across projects, contractors, departments, or asset types
- Supporting evidence retention for HSE, client, insurer, and principal contractor reviews
LifeSafety.ai supports this approach through connected modules for inspections, audits, site diaries, RAMS, and action tracking. If you want to move beyond static forms and build a more responsive compliance system, explore our digital safety management features, safety audits module, and site diary tools.
Practical next steps
- Review your current inspection template against your highest-risk activities.
- Check whether every finding currently includes owner, deadline, and evidence for closure.
- Measure repeat findings and overdue high-risk actions over the last quarter.
- Introduce digital action tracking if closure performance is weak.
- Re-brief inspectors on interview technique, evidence quality, and escalation thresholds.
Done well, inspections are one of the strongest proactive controls available to any UK organisation. They help you identify hazards before harm occurs, demonstrate due diligence, and create the evidence base needed for continuous improvement. Done poorly, they become a false assurance exercise. The difference lies in preparation, structure, evidence, and follow-through.
Frequently asked questions
How often should workplace safety inspections be carried out?
The frequency should reflect risk. High-hazard areas may need daily or weekly inspections, while lower-risk environments may be suitable for monthly or quarterly checks. Construction sites, manufacturing lines, and temporary works often require more frequent inspection because conditions change quickly.
What is the difference between a safety inspection and a safety audit?
A safety inspection focuses on current site conditions, behaviours, and immediate controls. A safety audit examines whether the wider management system is designed and operating effectively. Inspections are usually more frequent and operational; audits are broader and more systematic.
Who should carry out a safety inspection?
The lead inspector should be competent for the environment being reviewed. That may be a safety adviser, manager, supervisor, or specialist inspector, depending on the risk. Involving worker representatives is good practice because it improves challenge and helps surface issues management may miss.
Do safety inspection findings need to be linked to legal requirements?
Yes. Where possible, findings should reference the relevant legal duty, approved code of practice, or internal standard. This strengthens the report, clarifies why action is required, and helps prioritise issues appropriately.
Can digital inspection records be used as evidence during an HSE investigation?
Yes, provided they are accurate, secure, and supported by a clear audit trail. In many cases, digital records are stronger than paper because they include timestamps, photographs, action histories, and closure evidence.
How do inspections support RIDDOR and incident prevention?
Inspections help identify unsafe conditions and management failures before they lead to reportable injuries, dangerous occurrences, or occupational disease. They also help verify whether lessons from previous incidents have actually been implemented on site.
Related Articles
Incident reporting software comparison: UK guide 2026
Discover our incident reporting software comparison for UK workplaces. Explore top options like Lifesafety, SafetyCulture, and more.

Safety management solutions for construction: UK SMS guide
Discover essential safety management solutions for construction sites in the UK. Learn how a mobile-first SMS can enhance safety and compliance.

Best health and safety software for UK workplaces: 2026 guide
Discover the best health and safety software for UK workplaces in 2026. Explore top picks like Lifesafety for compliance and efficiency!